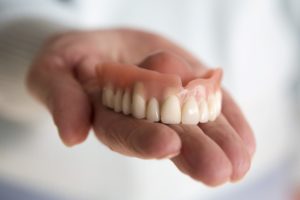
 Dentures have been used for generations to replace missing teeth. New technologies allow them to look and feel more natural than ever. Your denture is custom-crafted to fit your mouth like a glove as it rests on top of your gum tissue. Suction is all that’s needed to hold your new teeth in place. However, if you have a big speaking event or will be eating a juicy steak, you may want a little more stability. A denture adhesive can help, but only as a temporary solution. Here’s what you need to know about using a denture adhesive.
How to Use Denture Adhesive
Adhesives can be found in many forms, like stripes, pastes, and powders. The type you choose depends on your personal preferences, but your dentist will recommend avoiding or limiting the use of any with zinc. Too much zinc can lead to medical problems. You may also need to try different types or brands until you find the best one for your needs.
Dentures that are well aligned should stay in place for most of the day if the adhesive is applied correctly using 3 easy-to-follow steps:
- Brush Your Denture
Brush your dentures with a soft-bristled toothbrush and nonabrasive toothpaste. Rinse them with cool or warm water. Never expose them to hot or boiling water to prevent warping.
- Apply the Adhesive
Apply the adhesive to your dentures according to the directions on the product’s instructions.
- Position Your Denture
Carefully position your dentures in your mouth and hold them in place for 5 to 10 seconds.
If you have adhesive overflowing into your mouth after inserting your denture, you’re using too much. As a general rule of thumb, 2.4 ounces of adhesive should last for 7 to 8 weeks when used for both the upper and lower arches.
How to Remove Denture Adhesive
You must remove the adhesive at the end of the day. As you get ready to call it a night, follow 3 steps to remove the adhesive:
- Gargle Salt Water
Gargle with warm salt water for about 30 seconds to loosen the seal of the adhesive.
- Remove and Brush
Remove your dentures by rocking them back and forth before pulling them out of your mouth. Rinse and brush your denture before placing it in an overnight soaking solution.
- Clean Your Gums
Don’t forget to clean any adhesive residue from your gums using a soft toothbrush or cloth and a small amount of toothpaste.
Enjoy Added Stability
If your dentures aren’t staying in place, it may be time to have them relined. Your dentist can make the necessary adjustments to restore a snug fit without needing an adhesive. If you’re ready to say goodbye to slipping and irritation permanently, ask your dentist about adding the support of dental implants to your smile.
About Dr. Daood Alvi
Dr. Alvi earned his dental degree at the University of Minnesota and continued his education in advanced services, like endodontics, dental implants, and sedation dentistry. He has the qualifications you can trust to replace your missing teeth. Contact our office today to request your consultation.
